For more on the <display> tag see this post. For more on the <item> tag see this post.
Here's an xml file of the 2 combined. The things to look at are that the <item> is inside the <display> . Then look at the bind variables :TABLE_NAME which will be taken from the row clicked on in the grid. Lastly in the sql and confirmation there's #TABLE_NAME# which will also come from the row clicked on and do a replacement of that text.
<?xml version="1.0" encoding="UTF-8"?>
<displays>
  <display id="" type="" style="Table" enable="true">
    <name><![CDATA[Good Stuff Report]]></name>
    <description><![CDATA[my great report]]></description>
    <tooltip><![CDATA[This is the best report ever]]></tooltip>
    <query>
      <sql><![CDATA[select * from user_tables]]></sql>
    </query>
    <item>
      <title>Logging</title>
      <prompt>
        <label>Logging:</label>
        <value><![CDATA[STATIC:LOGGING:NOLOGGING]]></value>
        <default><![CDATA[select logging from user_tables where table_name = :TABLE_NAME]]></default>
      </prompt>
      <prompt type="confirm">
        <label>Change logging status of selected table?</label>
      </prompt>
      <sql><![CDATA[alter table "#TABLE_NAME#" #0#]]></sql>
      <help>Change the logging status of a table.  LOGGING will log changes to the redo log file.<br/>
  NOLOGGING will not log changes to the redo log file.</help>
      <confirmation>
        <title>Confirmation</title>
        <prompt>Table "#TABLE_NAME#" set to #0#</prompt>
      </confirmation>
    </item>
  </display>
</displays>
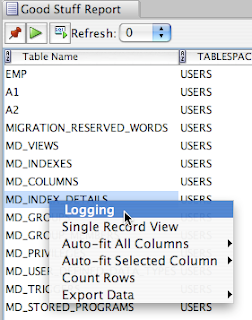
Here's the menu choice:

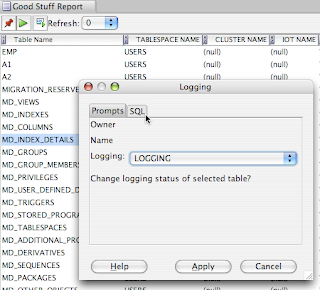
Here's the dialog:

Here's the confirmation:
